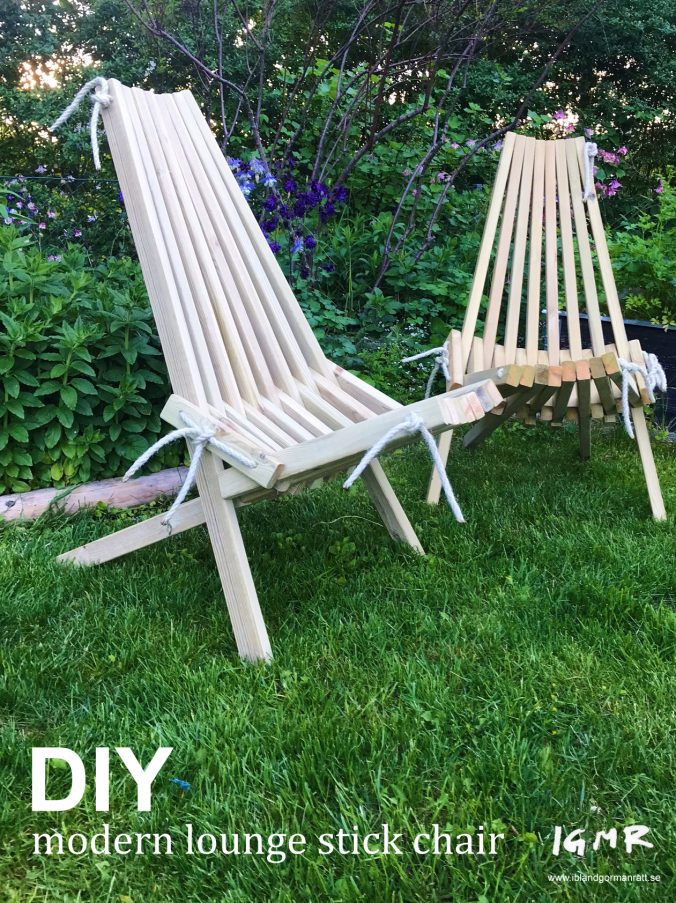
DIY Lounge Chair or Kentucky Stick Chair – a step by step guide. Can you build outdoor furniture yourself?
For a few years we have had our eyes on some chairs that are traditionally called ”Kentucky stick chair”. There are several companies that manufacture and sell them but they just look so easy to make.

These chairs are not only stylish but they turned out to be really easy to make yourself. They are cheap and easy to fold.
Let´s get started
A quick check on Pinterest showed that there are quite a few DIY projects on the theme, but most are in the imperial and not the metric system (I live in Sweden = metric). In addition, most people use threaded rods and nuts to put them together, but I want to use ropes. Therefore, I made my own drawing in centimetres with the dimensions I want on the chair and adapted the this project for using ropes instead of threaded rods.
You can find my drawing in pdf format here for free download.
DIY Lounge Chair – Materials & tools needed
Materials
Wood – I want these chairs to be cheap and therefore I chose to make them in the cheapest material in a good dimension I found – impregnated fence slats 28 × 45 mm. The pressure treated fence slats cost one dollar per meter, which means that the cost is around USD 10 per chair. Add some waste and it will be about USD 13.
Rope – Since the chairs are to stand outside, the rope must withstand the weather and wind. You can choose hemp or jute rope, but we have chosen 8 mm polyhemp . It is a hemp rope with UV-stable polyester in it. This means that the chairs can stand outside year after year. One chair is consumes about 5-6 meters of rope to make which means that the cost of the rope is around USD 3.
Tools
This project can be done with simple tools. A hand saw, sandpaper and drilling machine as well as a 10 mm wooden drill bit.
I already have a miter saw and an oscillating sander. It makes the job a little easier. Ideal would also to have a drill press to make the holes straight.
Step by step guide
- Download my drawing here and buy 13 meters of fence slats and 5-6 meters of rope per chair you intend to make.
- Sand the fence posts. I sanded our fence posts with 80, 120 and finally 220 grit sandpaper. The easiest way is to sand the slats when they are uncut. Just dont forget to sand the cuts later.
- Treat the slats. This step is not a must. Our fence slats are pressure treated. You can paint them, oil them or, as in our case, treat them with Sioo:X. This is so that they become naturally gray faster.
- Rip the slats according to the diagram in my drawing.
- Drill the holes. I made a template that I held against the slats and drilled through. Preferably, the holes should be completely vertical, but then a drill press is required. I drilled freehand with my battery powered screwdriver and it worked fine too. A tip is to tape the slat so that you do not get an ugly exit hole when drilling. Another tip is to tape the pieces together and drill two and two. A lot quicker. Our holes are 10 mm to fit a rope of 8 mm.
- Sand so you don´t get splinters.
- Sort and lay out the pieces according to the diagram in my drawing.
- Assembly is easiest by taking a look at this video.
DIY Lounge Chair – step by step guide in pictures


How did our DIY Lounge Chair turn out?
In fact, this is one of the DIY projects I’m most happy with. Easy to make, cheap, very stylish, stable, durable, folds easy and durable in that they are pressure treated.
If you want, you can make them in, for example, larch, oak or some other untreated wood and have them indoors instead. It is also easy to change the dimensions or add a couple of slats if you want them wider.
If you have questions about the construction or about building outdoor furniture, feel free to comment or send me an email at igmrmail@gmail.com
If you want to pin this project on your Pinterest, do so below.
https://www.pinterest.se/pin/628533691749103313/See also my other instructions for building outdoor furniture – DIY pallet lounge chairs, our DIY planting table made of pallets or ALL DIY projects.

[…] sure to also check out my step by step guide making theese lounge chairs (or Kentucky stick […]